One of the main things I wanted when we purchased our own house was a space where I could do some light woodworking. I don’t have a ton of tools, though I am working on that little by little. Over the past few weeks I built a little workbench for myself (I guess not little – using the ShelfLinks system I put together a sturdy 4×8 bench) and now I finally have a spot to pile my tools, goodies, and projects!
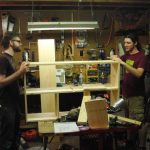
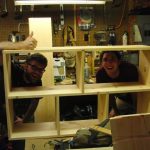
Once the bench was done, I knew the first thing I wanted to do was breathe some life into an old record shelf I’ve had bouncing around. My friend Travis and I (with help from more friends Justin and Dylan) built this shelf years and years ago. In truth, Travis did probably 90% of the work plus came up with the plans for the shelf (and another, much larger, option) while the rest of us stood around, ate burgers, and did whatever Travis told us to do. In digging around for photos of the original build I learned that the original shelf was built in 2010 which is a fact that kind of blows my mind. I knew it was done ages ago but had no idea it was coming up on being 8 years-old.
This thing has been with me through all of the moves I’ve made in those 8 years. From Plattsburgh, NY; to West Chester, PA; to Burlington, VT; back to West Chester, PA; back to Plattsburgh, NY; down to the hellscape of Bangor, PA; over to Bethlehem, PA; and now, finally, to Austin, TX. The shelf is kind of a beast. We made it from pine utilizing dado joints for the interior pieces and rabbet joints for the corners. It’s super lightweight, so I can carry it around like a real tough guy on one arm, but it’s durable enough to have lasted through seven different long-distance moves over the past 8 years.
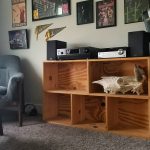
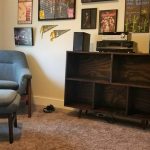
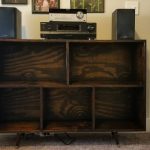
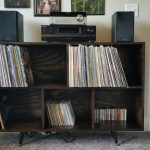
We never really did much finishing on it, though. At the time, I liked just having the natural wood finish – and I still do like the way that looks! But, when I say we didn’t do any finishing I mean we didn’t do any finishing. We didn’t stain it, seal it, or anything else. In the office in our new house, I wanted to have a wall of shelves and a desk along one side. I’ve got this in place and have stained the wood a nice dark walnut. When it came time to finally jazz up my record shelf, I knew I wanted to do two things – make the color match and add some legs.
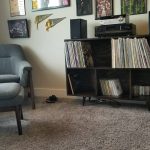
I had most of what I needed around already from my previous desk/shelf project – stain, poly, brushes, and rags. I needed to pick up some legs, give this sucker a fresh sand, and then give it some new life! Over the course of a week or so I got to work in the garage and now have a spruced up record shelf to hold my records and tapes. I’m super happy with it and am stoked to give this sucker some new life for the next 8 years.


Comment section